In both metalworking and woodworking, efficiency is essential. Traditional threading involves two separate steps—drilling a pilot hole and then tapping internal threads—which often leads to frequent tool changes, alignment issues, and reduced productivity. But there’s a smarter solution: the combined drill and tap tool.
Why Combined Drill and Tap Tools Improve Productivity
The tap is a critical tool in thread creation, but the conventional process of using separate drills and taps can cause inefficiencies. Frequent tool switching slows down workflow and increases the risk of misalignment, which affects both thread precision and product quality.
That’s where combined tap and drill tools come in. These innovative tools integrate the drilling and threading steps into one continuous operation. This not only saves time but also ensures perfect coaxial alignment between the drill and the tap, greatly improving accuracy and thread strength.
Design Highlights of the Combined Drill and Tap
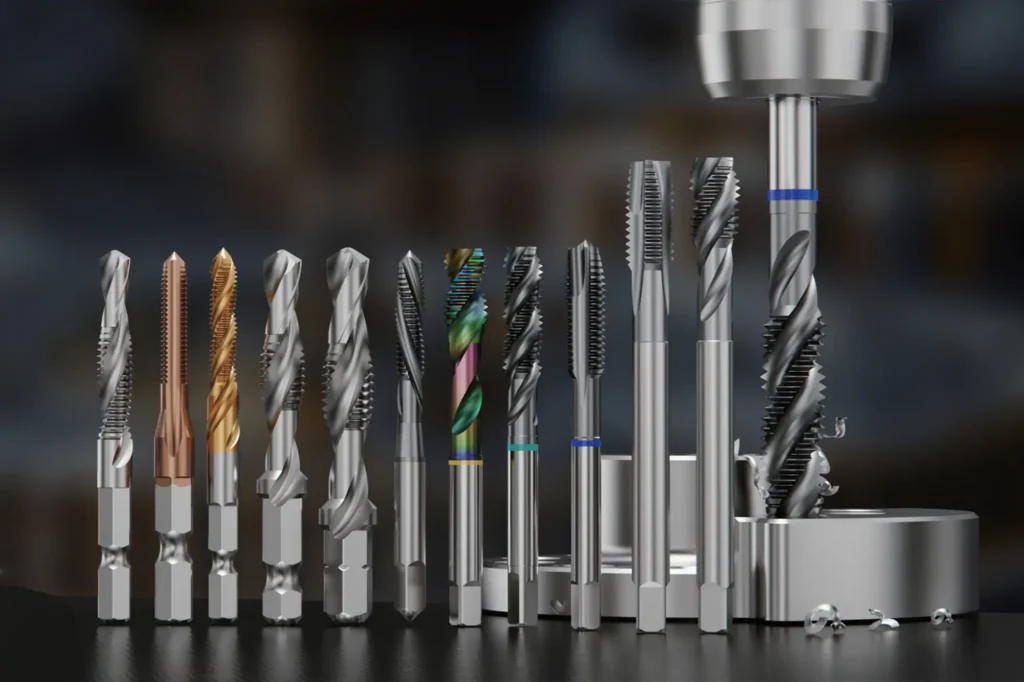
The combined tool typically consists of an upper and lower connecting rod joined by a sleeve ring.
The lower rod features a narrow cylindrical body and front-end face with a round block.
The upper rod is equipped with a drill tip, while the lower end has thread-cutting teeth supported by a cutting pin cone.
An irregular groove along the shaft helps with chip removal during threading.
A convex block and snap structure are designed near the upper end to enhance stability during rotation.
Internal threads within the connecting rod ensure a tight, secure connection with the driving machine.
This precise design allows for smooth drilling followed by accurate tapping, without removing the tool or repositioning the workpiece.
How to Use the Combined Tap and Drill Tool Effectively
Select the Right Size
Choose a combined tap and drill tool that matches your desired thread specifications and the material being processed.Secure the Workpiece
Clamp your material firmly to avoid shifting during operation.Start Drilling
Begin at a slow speed to reduce heat buildup and wear on the tool.Tap the Threads
As the hole reaches the proper depth, continue into the threading phase by increasing speed gradually. Apply steady, consistent pressure without forcing the tool.Clean the Threads
After the operation, remove any chips or debris from the hole to ensure a clean, accurate thread.
Final Thoughts
By combining drilling and tapping into one efficient step, this tool minimizes production time, improves thread accuracy, and reduces tool wear. For workshops looking to boost output without compromising on precision, the combined tap and drill tool is a practical and powerful solution.
Whether you’re a professional manufacturer or a skilled technician, adding this tool to your process can streamline your threading tasks and deliver consistent, high-quality results.